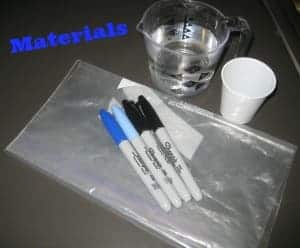

Here is the How-to:
- Fill clear, plastic cup half way with water. Put 1 or 2 drops of food coloring in the water and stir.
- Mark with a permanent marker where the water level is.
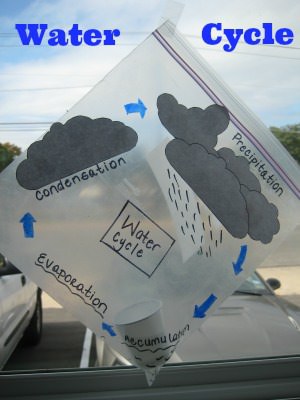
- Draw arrows are going around the outside of the bag to describe the water cycle. Begin with evaporation starting at one bottom corner and going to the opposite top corner. Condensation is at the top corner. Precipitation then goes from the top corner back down to the bottom corner to complete the cycle.
- Place the cup carefully in the bottom corner that you started your diagram at. Be sure not to spill any water!
- Seal your bag, making sure to leave some air in the bag to represent the air in our atmosphere.
- Carefully tape the top corner of your bag to a sunny window so that the cup is nested upright in the bottom.
- Leave your bag hanging and watch the water cycle take place throughout the day.
- The next day, observe what has happened to the water in the bag and the water level in the cup.
How does it work?
The water from the cup represents a body of water (river, ocean, lake, etc.) and evaporates into the bag due to the heat from the sun. Evaporation is the process of water converting to vapor, which then collects to form clouds during condensation. This is represented by the water droplets on our plastic bag. The droplets then drip down the side of the bag and collect at the bottom due to gravity and the weight of the droplets. This represents precipitation, which can be in the form of rain, snow, hail, etc. The water will then evaporate again to continue the cycle.
